Making a two sided Printed Circuit
Board.
Making double sided PC Board.
authored by TheseusRob@cs.com and give me suggestions if this is hard to follow.
Return to the PC Board instructions Page using this link.
Here we describe a method that has worked for us many times in the making of a double sided PC board. Clearly, when one is making a PC board with copper on both sides, "registration" is very important. Registration is the alignment of one side with the other; and the two sides MUST be correctly aligned. (Perfect Registration)
We will describe a process rather than try to Illustrate it with drawings. We have described the process many times to groups and over the telephone and it can be understood easily by anyone that has made a PC board before. We will tell you how to make an Exposing Envelope.
The process requires that you make an Exposing
Envelope out of the two pieces of circuit artwork (top and bottom of board), which
you perhaps refer to as positives or negatives. For the sake of discussion, we will refer
to them as positives.
1. be sure to leave at least a quarter inch of
clear film around the circuit on all sides when you make your positives. You will need
this on at least three of the four sides.
2. Place the two positives (top and bottom)
together so that they are perfectly aligned. Then tape the two positives together at the
edges with Scotch tape* on THREE sides so that the fourth side can be the opening of the
envelope. It works well if the two films are identical in size and the tape wraps around
the edges.
3. The fourth side is the opening of your
Exposing Envelope. Working in safe light, slip the PC board into the envelope. Naturally,
you planned everything well so that the PC board fits nicely into the envelope; a lose fit
is best as you don’t want it so tight that it stretches your tape or positives.
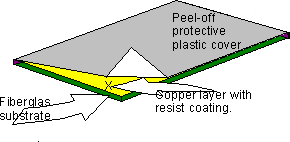
When using a Datak precoated (Premier series)
double sided PC board, you’ll remove the protective plastic cover from both sides and
discard the plastic. Be sure to peel (roll) the plastic off as pulling "up" on
it can take some of the resist with it.
4. The board will have to be held VERY securely
inside the envelope; do this by allowing the PC board to stick out of the envelope on that
one open side. Let the board stick our about 1/4" and tape the board to the envelope
on both sides; tape neatly! This will prevent movement and keep everything nicely
"registered".
When the board is securely taped to the
envelope, expose each side for the recommend time and then develop the board. Turn
the board and be sure both sides are completely developed just as you would for a single
sided PC board. (I use my fingers; but the company says to wear a thin rubber glove.)
Notes: A simple process, no?
About the only Caveat is to be sure not to run tape on top of the circuit patterns as it
can block enough light during exposure to (possibly) cause a problem. You’ll soon learn to
allow room for tape, trim the envelope opening and leave a bit extra on a board to tape at
the opening. Minor things.
Don’t make the envelope too tight. Shoot for
1/4" on all three sides that will be taped.
Sometimes, this author trims the film for the "bottom" side larger than the film positive for the top side. It is easier to tape and hold good registration during taping if the piece of film on the bottom is a bit larger than the top piece. However, if the top and Bottom side film positives are of equal size (as mentioned above), it sometimes makes it easier to handle the finished envelope. Then you have to put tape on the top film an wrap it around the edges without the two films travelling and messing up registration. For bigger boards (6 X 6 on up), I am forced to use the "equal size" films as thing seem to work more easily.
QUESTIONS? SEND ME A NOTE: TheseusRob@cs.com and I’ll try to get back to you right away.
